Crafty Blogs
Showing posts with label Notepads. Show all posts

Sunday, October 09, 2011

Ok this is odd but it works as a way to make a page for a mini book.


Ok I got given some long strips of off cuts.

Mine are 6cm by 1 meter long.

Yep I know long strips.

Cut 6cm by 13cm.
Score at 6.5cm.
Fold in half..
Mark 1 and 2.

Cut another piece.
Book Jacket.
6cm by 23cm.
Score at 5cm, 11.5cm, 18cm.
If you marked the 4 sections,
A B C D.

Fold in half at the 11.5cm.
Then fold the 5cm bit inside on both sides.
A and B will touch,
C and D will touch.

See It is  a bit like a book jacket.

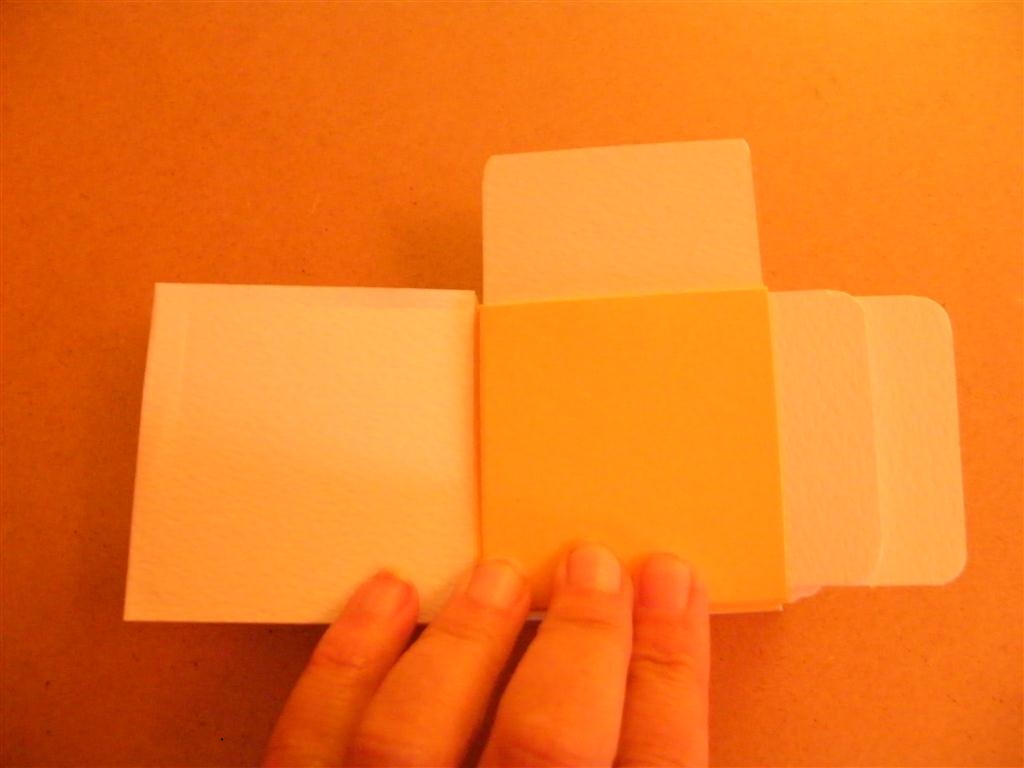
Now slide the first piece of folded card inside,
the second but the folds should be on 3 sides.

A and B will have 1 sandwiched in the middle.

C and D will have 2 sandwiched in the middle.

If you punch your holes in the unfolded side.
This gives you a pocket at the top.
Also two pockets on the side.

Tags need to be cut at 6cm by 7cm.


Making the book.


Was trying to see how to hold the the bottom of the
strip closed to make pockets.
Which is how I ended up doing the top as a sample idea.


It's going to be too hard to explain this so..


I scored the whole meter strip.
Every 6.5cm, it made a concertina.
But you can just glue lots of smaller strips
together to make a strip as long as you need.

Miss the first and use the 2nd and 3rd
of the strip sections.

Take one of the book jacket.
Hold the middle fold at the base wrap it round the 2nd and 3rd
and tuck the bit marked A inside.
You may need to bend it a bit and tuck D inside too.
Don't worry as you can't see if you bend or crease section D.

You now have a pocket.

Take 4 and 5,
Repeat using another jacket.

Keep going till you have one section left.
I had two, so I cut one off.

To make a cover..
Yep it looks like another book jacket.
Measure you spine on this book of pocket and and a 1/2cm.
Mine was 2cm including the extra.

So I need 30cm by 7cm.
So I score at 7cm and 14cm,
Turn the paper round and score the same again.
This way I know it will be same on each side.
Also works if you have a smaller scoreboard.

Add glue all over what is your wrong side
if your using patterened papers.
JUST DON'T ADD GLUE TO THE INSIDE SPINE
Place the spine of your pocket book to the
 unglued spine of the cover.
Line it up so there is the same distance top and bottom.
Sandwich the first  page of you book within the two bits 
of the cover.
Do the same with the back page.

I like covering them this way as it means
you have 3 pieces of card for strength.


I showed this so you can see one tag in the top and
one either side of the fold.
so no glue apart from the covers. 
If your card is not long enough for method all I do is
make the front and back section as two pieces and just join it where the spine would be.


Bigger pages.

29cm by 14 cm.
Score at 14.5 cm.
Mark inside 1 and 2.

Jacket cover.
30cm by 14cm.
Score at 0.5 cm,15cm, 29.5cm 

Mark A B C D.

Just wrap and tuck the
0.5 flap inside, you will need to add glue this time, to hold these tiny flaps inside.




Wednesday, June 01, 2011

A5 Smash Style Book.


I had another go.
Grabbed a load of Envelopes and layered 3 in a row.
Made a lovely pocket just by folding an A4 in half and adding glue at the bottom.
Just added loads of my spare papers.
Found some thick card added that too.
Still looked bear so added the tabs again.


Thursday, March 03, 2011

Lovely Little Mini Book

I can honestly say this is my own design.
I have never seen anyone making one like it before.
It's made from one sheet of 12 by 12 paper.
It works best with a small all over design.

It measures 3" by 2".

I know the photo looks a mess.
However it much easier to use this cutting guide.
Score at 2" 4" 6" 8" and 10"
Turn and score at 3" 6" and 9"

Now can you see the X marks.
You cut these.


The cuts will be like this.
To fold this design takes just a second.
With your design face down,
Fold the paper in half at the 6" fold.
The easiest way to explain is that 
 pattern will fold onto pattern.
and underside onto underside.
If when you try to open your book
you see the underside of the paper,
Just reverse your folds.

I added glue to the underside of my pages
 and sealed them down but you can
make them into 
tiny pockets.

For my covers.

I cut a 2 1/2" by 7"

Score at 3 1/4" and 3 3/4"
Then add glue to your book into the cover.
2" by 6 1/2" for the green cover paper.
Decorate. 


Wednesday, November 24, 2010

Notebooks with Anna Griffin Embelishments


Ok so this took me 20 mins to make.
All I did was stick a precut sheet to the front
and added one of the pre-made toppers.
But I think they will make great gifts.


Thursday, September 16, 2010

Finished Easy scrapbook..part 2

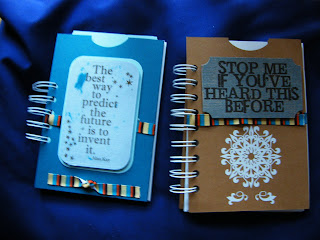
I decorated the front of the one I showed you yesterday, and along side is one I made with more binder holes.

I really want to make a bigger one next, as I have some baby bits I want to make into a scrapbook.
I have been trying to use up the bits in my bit box.
Once a month I sort them into colours and try to use up all the tiny bits to make cards or scrapbooks.
Otherwise I end up with a massive box on the table full of odds and ends.


Wednesday, September 15, 2010

Easy Scrapbook or Notebook..


Ok, bad picture but you can see my basic design.

I take A4 paper or thin card for the inside and cut it into A6 size.
So I get four sheets from each original sheet.
I then take an A5 card and just fold it in half to make my covers. But you could just cut a A4 in half.
I punch my insides with the cinch.

Making the cover into a pocket.
Take the folded A5 card and add glue in a thin line at the bottom, punch a half circle at the top of the card going through both layers.
Then punch holes in the side that doesn't have the fold with the cinch.
This way you don't need to add glue and once bound it will form the pocket.

Once the book has been cinched, I add an insert that is 1cm thinner and shorter that the cover size, this way it slides inside easily.

I must admit I have been letting the kids use these as notebooks. So far this week we have made 6.
They have used what ever odds and ends they could find to decorate the covers, both back and front, as with kids more is always more...

My Daughter has even made one for the Teacher, who loved it.

Thursday, June 10, 2010

Notebook fever

This is what I have been making for a change I got given the paper by the vicar, well rather it was stuff he left behind when he moved house so I got loads of strips of paper and making notepads was the only thing I could think of to do with it. They were not very hard to make as I have the bind it all, which I now intend to sell as I've gone and bought the new version from a different company so if anyone wants to buy mine it's £45 including postage, but I do intend to give you enough to make a loads of books for yourself.
I will include the following with it:
5 wire elements 6mm
5 wire elements 8mm
5 wire elements  12.5mm
20 sheets of mount board mixed sizes

The CD how to is unopened.
It also has a metal bar to make it cut nearer the spin.
A keyring with all the binder sizes on.
and will be in the original box.