Crafty Blogs

Friday, November 04, 2011

Pocket Page. Mini Book.


I was using some 6" by 12" double sides paper,

Which I had scored at 2", 6" and 10"
Then at 5 1/2".


I had folded the 1/2" up to make so it made a pretty border.
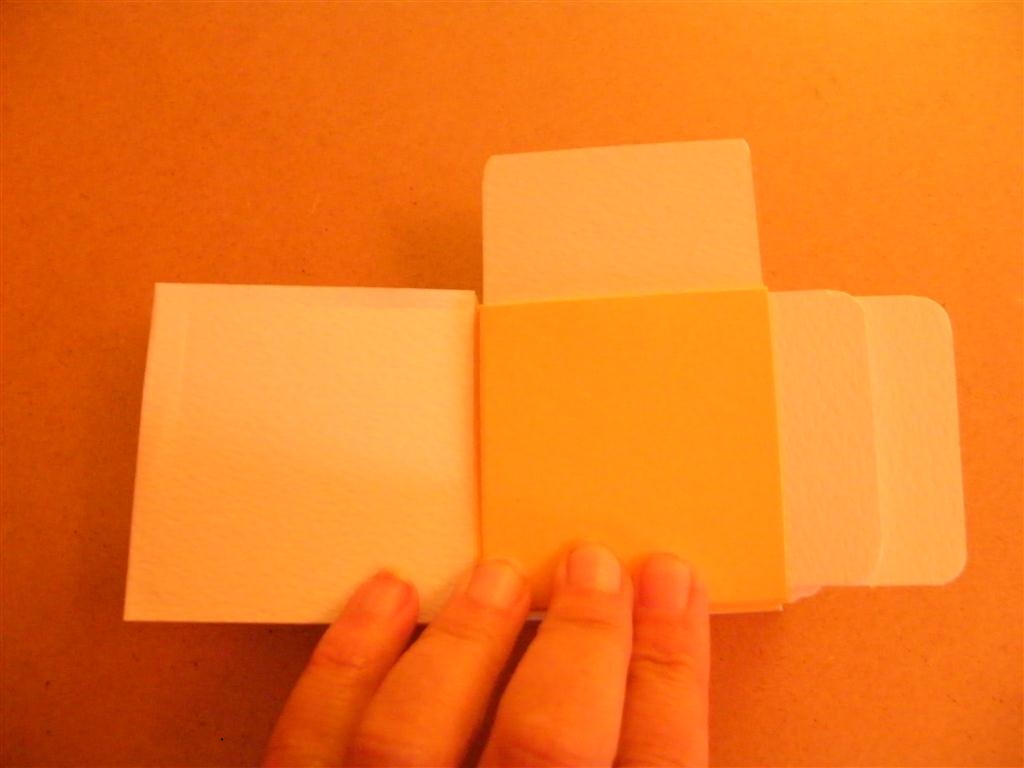
I had folded the side outside bits, but had left it like this on the table. 

I had left it on the side when my crafty little daughter who was watching me, decided to fold all the end corners down to be helpful as she thought I was making an envelope.


Not wanting to waste what looked pretty good.

I added glue to the corners and glued it down.

It was still flapping so I added a tiny dot of glue in the bottom at the fold, cinched the holes, and added glue to the bottom inside bottom, to turn it into a pocket.

Also realised if I had not glued it could have just folded it the other way round to make great pages in a book.

Think I owe someone a treat.

Tags will be 3 1/2" by 6" for inside pocket.
3 1/2" by 4 1/2" for the outside.

And I made 6 pockets from 3 double sided sheets.


Thursday, November 03, 2011

Origami Box with Lid, made out of one piece of cardstock


Have you ever been asked 2 years after you make something, How did you do that?

Well this is one of those times.


Take a 9" by 12" piece of scrapbook paper.
It needs to be a decent weight or it won't hold.

Score at 3" 6" and 9"
turn 90'.
Score at 1 1/2". 4 1/2", 7 1/2" and 10 1/"2.

Now using your cutter cut a tiny bit of each side of you paper on the 9" it really is like 1/16".
Your card is now 8 7/8" by 12".
It has to be a bit of each side as this makes the box lid fit over the sides of the box and stops you having to fiddle with odd measurements.


All the folds are folded like valley folds,
This means wrong side to wrong side.
If you do this and crease them all you will find the design makes it self once you do the 8 cuts you need to finish.. 


The next bit sounds odd but is very important.
Measure along the top of the 12"
and mark 2 1/2" and 9 1/2" mark top and bottom.


Now draw a line to make these points meet.
You will be cutting this line.

You cut down  to the  1st score line
stop turn the card stock round
and cut  to the other score line.

You cut four times in all.


If you look at the picture it may explain this better, what you want to do is cut the score line you meet
 to make a T shaped cut.


Your lid will be like on a pizza box.

I did mine first and used wet glue to stick them down as  in the photo.


When you lift the remaining sections it
gives you the sides of your boxes.
The sides will over lap and you just glue them together to give you a little box in the center.

The lids then life up to meet in the center.


This can then be decorated any how you like.


So I decorated mine.
The inside of the lids is 3" by 3".

4 lots of 3" by 3" for inside the box as well,
you may need to take a bit off so it fits snug.

The outside bits of the lids are both 2 7/8" by 2 7/8".
The side panels are 2 7/8 " by 1 3/8"
You need 6 in all.
Then just add ribbon to close.

UK Scrappers One Stamp Swap.


Well this is my take on the one stamp.
They are all sat waiting to finish drying, as I used Glitter Glue for the lips and eyelids, it seems to take for ages to dry been out for 4 hours and still wet.
Think it may be an over night job to be sure.

I made a little 16 page book as I will be getting loads back stuck inside my book.
These are really easy and look great.


Sunday, October 09, 2011

Ok this is odd but it works as a way to make a page for a mini book.


Ok I got given some long strips of off cuts.

Mine are 6cm by 1 meter long.

Yep I know long strips.

Cut 6cm by 13cm.
Score at 6.5cm.
Fold in half..
Mark 1 and 2.

Cut another piece.
Book Jacket.
6cm by 23cm.
Score at 5cm, 11.5cm, 18cm.
If you marked the 4 sections,
A B C D.

Fold in half at the 11.5cm.
Then fold the 5cm bit inside on both sides.
A and B will touch,
C and D will touch.

See It is  a bit like a book jacket.

Now slide the first piece of folded card inside,
the second but the folds should be on 3 sides.

A and B will have 1 sandwiched in the middle.

C and D will have 2 sandwiched in the middle.

If you punch your holes in the unfolded side.
This gives you a pocket at the top.
Also two pockets on the side.

Tags need to be cut at 6cm by 7cm.


Making the book.


Was trying to see how to hold the the bottom of the
strip closed to make pockets.
Which is how I ended up doing the top as a sample idea.


It's going to be too hard to explain this so..


I scored the whole meter strip.
Every 6.5cm, it made a concertina.
But you can just glue lots of smaller strips
together to make a strip as long as you need.

Miss the first and use the 2nd and 3rd
of the strip sections.

Take one of the book jacket.
Hold the middle fold at the base wrap it round the 2nd and 3rd
and tuck the bit marked A inside.
You may need to bend it a bit and tuck D inside too.
Don't worry as you can't see if you bend or crease section D.

You now have a pocket.

Take 4 and 5,
Repeat using another jacket.

Keep going till you have one section left.
I had two, so I cut one off.

To make a cover..
Yep it looks like another book jacket.
Measure you spine on this book of pocket and and a 1/2cm.
Mine was 2cm including the extra.

So I need 30cm by 7cm.
So I score at 7cm and 14cm,
Turn the paper round and score the same again.
This way I know it will be same on each side.
Also works if you have a smaller scoreboard.

Add glue all over what is your wrong side
if your using patterened papers.
JUST DON'T ADD GLUE TO THE INSIDE SPINE
Place the spine of your pocket book to the
 unglued spine of the cover.
Line it up so there is the same distance top and bottom.
Sandwich the first  page of you book within the two bits 
of the cover.
Do the same with the back page.

I like covering them this way as it means
you have 3 pieces of card for strength.


I showed this so you can see one tag in the top and
one either side of the fold.
so no glue apart from the covers. 
If your card is not long enough for method all I do is
make the front and back section as two pieces and just join it where the spine would be.


Bigger pages.

29cm by 14 cm.
Score at 14.5 cm.
Mark inside 1 and 2.

Jacket cover.
30cm by 14cm.
Score at 0.5 cm,15cm, 29.5cm 

Mark A B C D.

Just wrap and tuck the
0.5 flap inside, you will need to add glue this time, to hold these tiny flaps inside.


Saturday, October 08, 2011

Tuck it in Book.


Remember the Napkin book.
While I was in bed last night I had a brain wave.
The gesso covers would be great as part of the project.

So I just punched them and decorated
to make my book .


So here goes on how to make the pages.

Take a piece of scrapbook paper.

Cut it down to 24cm by 24 cm.

Fold it in half , to make a triangle.
Line the folded edge up on your score board.
Now score at 11cm.
Flip the triangle over and repeat at 11cm.

In inches it's slightly smaller.
9" by 9" for the Square.
score at 4 1/2" from the edge.

Unfold the paper then refold the sides
you scored in,
then fold in half at the centre line.
Make your binding holes on this fold.
 Just cut the centre fold of your design
before you make the holes
 to make two pockets.

I made 8 pockets out of 4 sheets of scrapbook paper.

The tags inside the pockets
are made by
taking a piece of card and cutting it at
21cm by 11.75cm.
Score at 14cm and fold.
Cut a  piece of card 6cm by 11cm for matting.

or
 9 inches by 4 1/4.
Score at 6".
2 3/4" by 3 3/4" for the mat.


You can change the mat size to what ever you have to hand, mine were the off cuts
of the scrapbook paper.
So it matches the design.
Waste not want not..

These fit inside the pockets.

I also had some left over scraps of card,
these were just fold and matted once more.
Then tucked in to bottom fold of the pocket.

Tuesday, October 04, 2011

Napkin Fold Album.

I have made this style before.
Also see Laura hers are great.
 You just fold any square of cardstock in half to make a triangle,
open back out. 
Measure how long your fold is and mark into 3rds.
i.e 9" centre crease line,
Mark 3" and 6".
Then fold the other two corners
1/3 of the way to centre to make a pocket.


Really easy and looks great too.
You can just see the points of the triangle at each end as I added tags into the pockets.


Another Boy Mini.

Someone emailed and asked how I can make these using any sized cards.
Or just fold a piece of card you like in half.

If you look at the page it has the fold on the left.
I add glue to the bottom inside where the B of Baby is on the photo.
You can seal the edge I cinched as well but I can't see the point, but if you were using Rings it may be an idea.

Then I just bind them all together and decorate.

I don't plan what I will put on the inside pages.

I tend to start with my cover and get a topper, then gather a few bits of card that match, in this case it was blue for a boy, I always find a bit of foiled card lifts the design.

Then I just make mats and layers for photo's.