Crafty Blogs

Saturday, March 03, 2012

Award. For me.. Very Grateful.


I Got an email saying that Misty's Mum 
Ink on my fingers 
had given me an award as one of 5 blogs she liked.
So like you do off I trotted to see what her blog was all about.
There are so great cards so go have a look.

I need to go look now to find mine to recommend.

Now that I have the award there are several things I must do, they are -
  • Pass the award on to five other blogs that have inspired me. I shall look out my five blogs in a moment - they have to be blogs with less than 200 followers
  • Put a comment on their blogs so that they know. I will do this when I have sorted the 5 blogs
  • Link back to the person who gave me the award & thank them. I have done this above & I have also put a comment on Misty's blog.
  • Post the award on my blog. Which I have done in this post. Pride of place at the top.


Friday, January 13, 2012

What my kids did.


This is a very quick mini my kids made.

Not posted much for ages as have been busy.

It's just sealed envelopes cut in half and cinched.

Easy or what.

Tuesday, November 22, 2011

Xmas bookmarks.


Bookmarks.

These are my xmas ones, using gift tags for toppers.
Amazing what a Chomper can do to change a pattern.


Monday, November 21, 2011

Fanciful Album,


Xmas Album.


This is made with the Sizzix Fanciful Die.


I saw it and wanted it, only it was out of shock.
thanks Netty who had one in her cupboard.

I really loved that it had the flower shapes and a label shape included even the heart is used as a leaf.

Mini Card.


Just love the way you get a pretty edge.
The stamp was a gift in a swap.
I have loads of the envelopes.

Wednesday, November 16, 2011

Quick Mini Books.


I need to use up some Papers and Stickers.

Yes the cheap ones I got.


You will need:
1 Sheet of 12 by 12 thick Scrapbook Patterned Paper.

3 Sheets A4 200gms Paper.


Cut from the A4 Paper
6 pieces of 5 1/2" by 8"
Score it at 4" so it folds in half.

From the pattern paper,
Cut a strip 5 1/2" by 12".
Cut into 6 strips  5 1/2" by 2"
Score at 1" and fold in half.
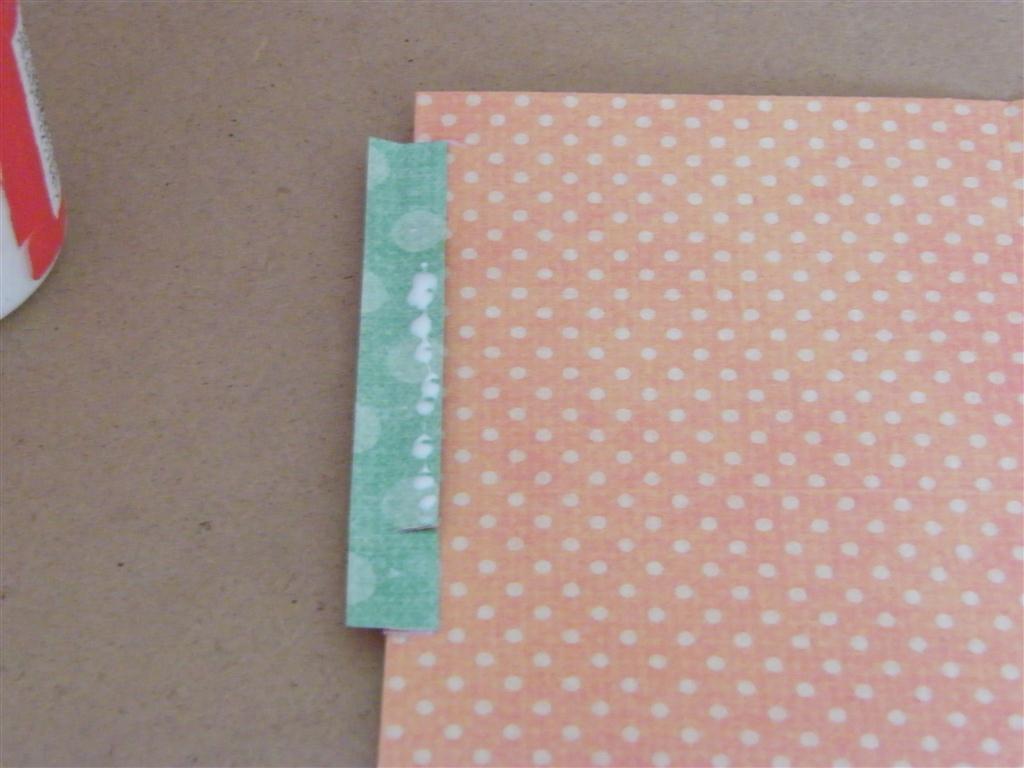
Add glue to the back of this strip,
Holding two of the plain paper together and add the patterned strip to the join.
Making a 5 1/2" by 16",


Continue holding another of the plain paper and joining till all 6 pieces have been joined together.

Leave to dry.


Once dry reverse the folds so the patterened paper is in the valley of the folds.
Add glue to the bottom inside of each of the pages and join together to make 6 pockets.

Leave to dry once more.

From the remaining piece of scrapbook paper
you need to cut the cover.

6" by 12".

Score at  1 1/4, 5 3/4" , 6 1/4" and 10 3/4".

Fold the 1 1/4 inch at each edge inwards, add glue underneath and seal down on both sides.


Add glue to the front and back of the book and fold the cover over so the book sits inside.


Done.

Now just decorate.


Saturday, November 12, 2011

Pocket Pages for Maddie.


My mother got me some of the 5 for £2 craft packs from C & C.


Maddie decided she wanted to use some on a book as I had been making them earlier in the day.

Not sure what your kids are like but mine
know what they want so gave up and let her raid the stash.


We took a A4 piece of card,
Scored it at 4", 8" and I just left the rest as my tab.

Then I scored at 7" to make my pocket at the bottom of the page.


Fold this up and it makes a pocket at the bottom of my page.

I folded the 4" section over.

As the bottom of the page pocket was not closed I simply cut a piece patterned paper 1 1/2" by 1 1/2".
Fold this in half point to point to make a triangle.
Glue this to the bottom of each side the page pocket.
It also adds decoration to the page.


This now gives you a pocket with a tab on the side.
A pocket on each page and a pocket at the top.
I mitered my edges and glued the flap to the next pocket page.
I made 5 in total and glued them all togehter..

As I wanted to stick mine into covers.
I made a tab for the other side too,
7" by  7"

Score at 3 1/2" miter the corners and add to the 1st pocket, this then glues onto the cover.

I still have to cover this but have give you a photo so you can see what I did.

My cover was worked out by doing this.

Page size. 4" by 7".

Add 1/2" for top.
Add 1/2" for bottom.
Depth of cover 8".

Add 1/2" for border .
Page Size 4"
Width of cover 4 1/2"
Add 1/2" for spine.
Double page size. 9".
Size needed 9 1/2"

Cover size if doing as one piece.
9 1/2" by 8".


So I scored it at 4 1/2" and at 5".
I just glued the book in at the scored lines.
Making sure it was equal top and bottom from edge.

I wanted to use some board inside my covers to make it stronger.

So I added and extra 2" to each measurement

Cover size if doing as one piece.
11 1/2" by 10".


 So I scored it at 1", 5 1/2" 6" and at 10 1/2".
Then at 1" and 9".

I used some board cut at 
4 1/2" by 8".
Added some glue to this and laid it between the scored lines.
Then add glue to the borders.
I folded the four corners in.
Then folded the sides down.
Then glued my book into the middle.

I will add some patterned paper to cover the
inside front and back to tidy it up.
7 1/2" by 4 1/4".

Look up a video on utube if you have never done this before as it can be confusing.

Hope you like it.

Monday, November 07, 2011

Variation on Pocket page.

I know this looks like the same thing but...
I realised I could cut it from a sheet of 12" by 12"
and have each side of the pocket and the flap any colours I wanted.
It also means you can use normal not double sided paper.

Cut your paper at 5 1/2"
Which leaves you a 6 1/2" piece.

You can have any size pocket width you like this way.
I cut one piece at 8" so when folded my pocket will still be
5 1/2" but 4".

I then cut a 4" by 6 1/2"
From this cut a 4 " by 4" square.
The piece that is left will be the bottom pocket.
Mine is  1 1/2"  by 4"
but you can use the whole bit left to create a deeper pocket seam.


Score all the pieced so they fold in half.
The bit at the top right is my fan fold.


Add glue to the side edges of your pocket seam or you won't be able to tuck a tag inside.
You don't need to glue the triangle flap as it will have the holes punched through and will stay put.

See looks rather like the post before.
Only the green was no the reverse of the double sided paper.

This next bit is a bit more complicated, but means you can have the flaps moving and they wouldn't have to be triangles.


You take your fan folded but of card.
As you look at it you need to cut 1 cm from the edge on the center two fold sections of the fan.

I then butted my cardstock so it covered the 4th section of the fan and glued the top and bottom section  1cm of the 3rd section to the cardstock.


Fold the middle section of the fan down and add glue between the cuts as in the photo.

You will find the cardstock won't open.
What sticks out is the back and front of the fan.
Add glue to these so it looks like my photo.

 The just add the folded triangle over the top so it covers the cardstock.
It means the whole of the triangle flap can lift up on the hinge you have made.

Once more added a seam pocket to the bottom to stop my tags falling out.
I know it looks fiddley to do but it does mean you can use all the inside of the pocket, but you can also glue it onto a scrapbook page and it would give you a pocket and the back to scrapbook on